
Blog Posts are great for dynamic content. When you want to write a blog, a new story, a news article, review, or show your latest photographs, you should create a new post.
In this beginner’s guide, we will walk you through all the features on the add new post screen, and how you can utilize them to create better content.
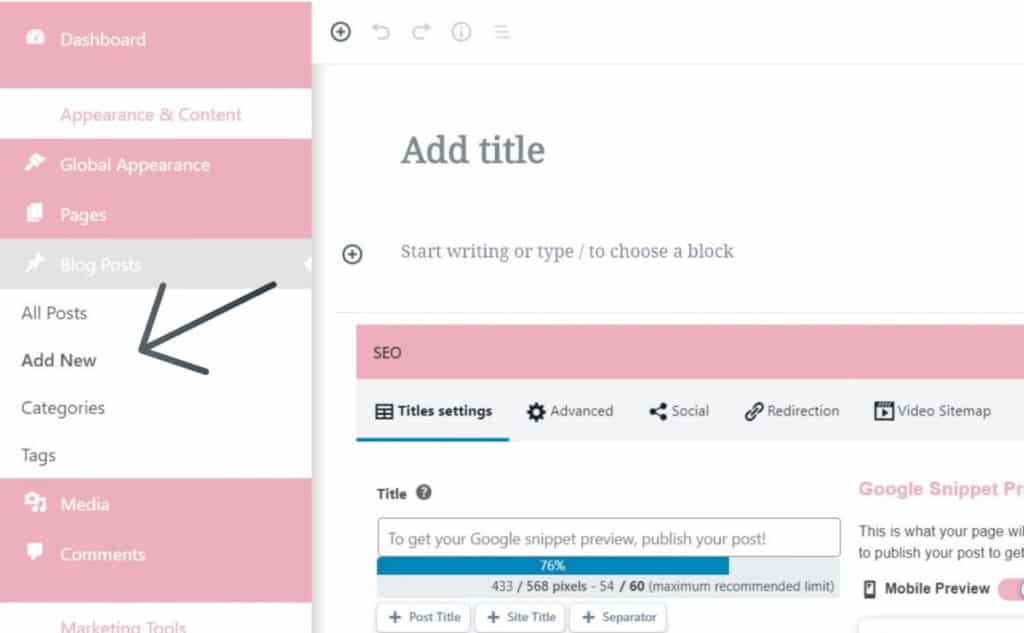
Add a New Post
To start creating your new blog post, select the “Add New” option under “Blog Posts”. This will take you to the Create A New Post screen.
Adding a Title and Content Blocks
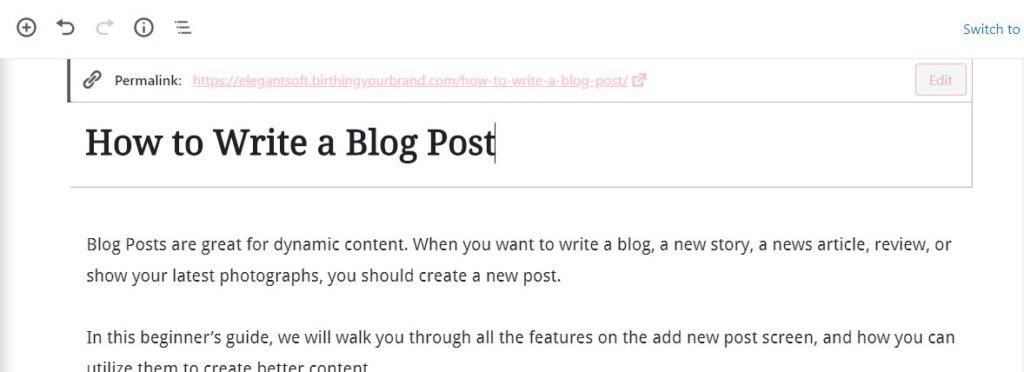
The post editor comes with a clean writing interface conducive to creating amazing content. At the top, you will enter the blog post’s Title. When you enter the Title, the URL (or web address) is automatically created.
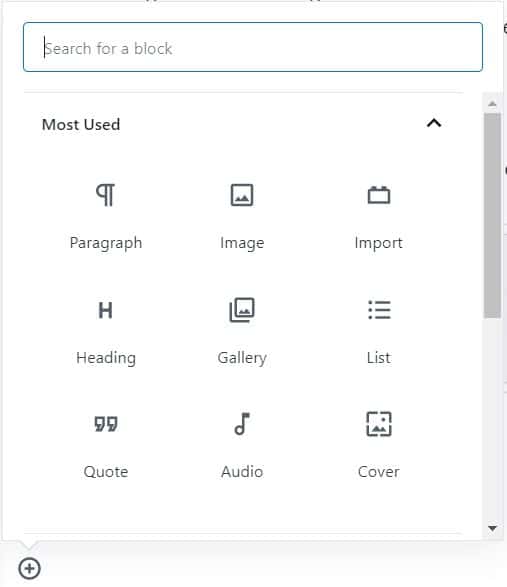
To add content, you need to add a block. There are multiple add block buttons on the screen that you can click to select and add a block.
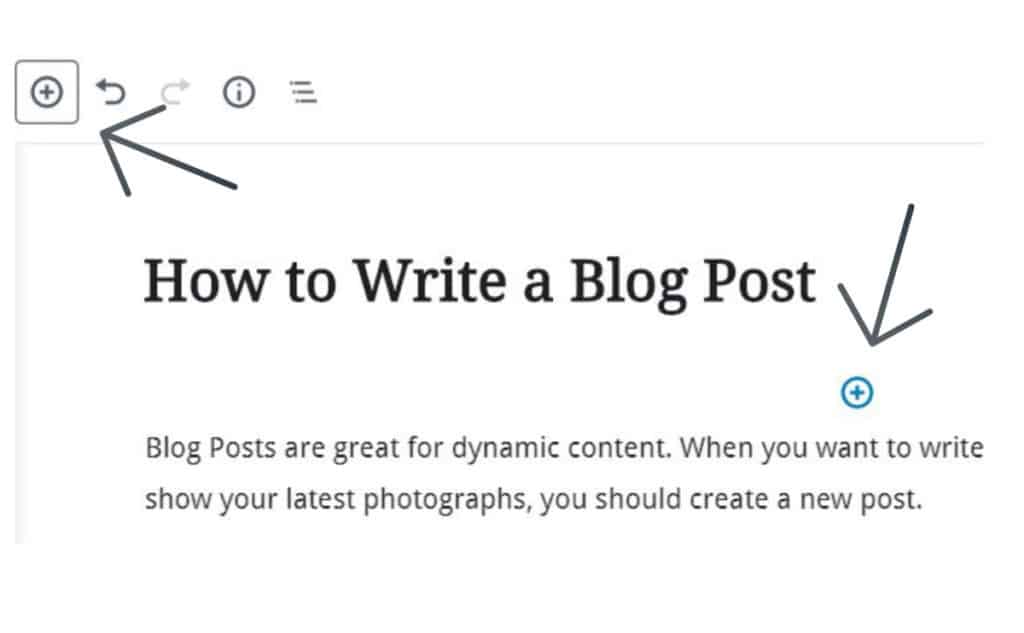
If you don’t want to use a mouse to click on the button, then you can use a keyboard shortcut by typing / to search and add a block.
Birthing Your Brand’s Blog Post builder comes with tons of blocks, including paragraph, columns, images, gallery, embeds, shortcodes, widgets, and more.
Adding Images, Video, and Other Media
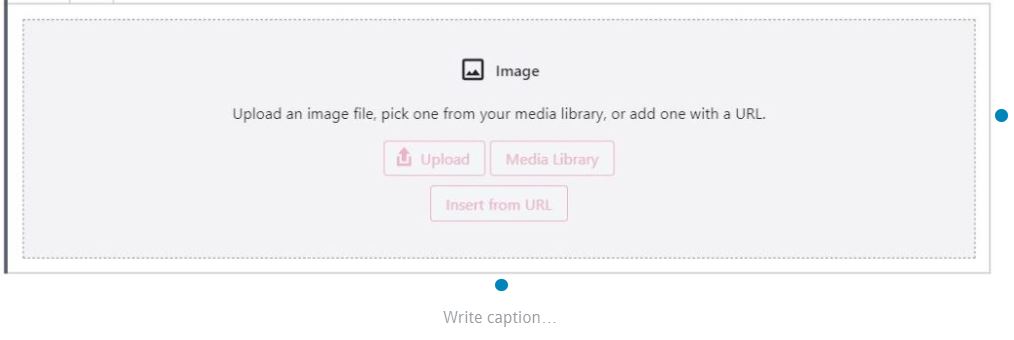
You can add images by simply adding the image block and then upload or select the image you want to add.
In fact, you can add almost anything with all of the content blocks that are included.
Whenever you add a block, take a look at the right side of the screen to see all of the options for the block.

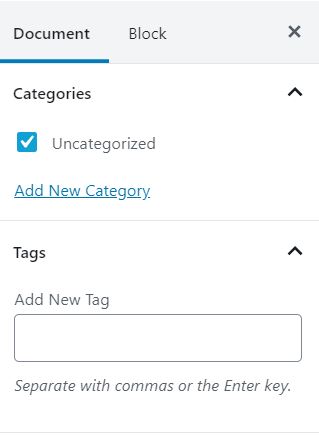
Adding Categories and Tags
The Blog Post builder allows you to sort your posts into categories and tags. These taxonomies help you organize your content into sections and topics.
Categories are meant for broad grouping of your posts. Think of categories as general topics or a table of contents for your site. They can be used to help identify what your blog posts are about.
Tags are meant to describe specific details of your blog posts. Think of tags as more focused, specific topics for your content.
The categories and tags settings are located in the right-hand column, under the Document settings.
Adding a Featured Image
A featured image (also known as post thumbnail) is the main article image which represents the content. When you add a featured image, it will be displayed on your website on your blog posts, blog archive page, and anywhere you add a posts widget on your website.
The featured image settings are located in the right-hand column, under the Document settings.
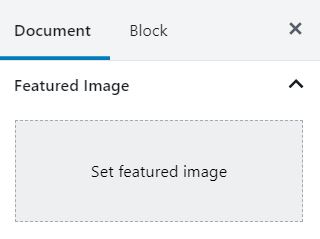
Click on the ‘Set featured image’ button and then select or upload the image you want to be used as the featured image.
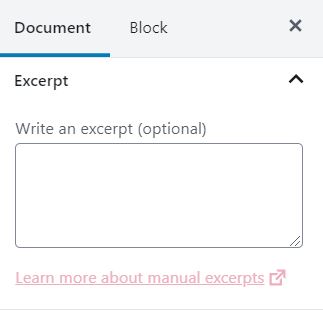
Adding Excerpts
Excerpts are a short summary of your blog post. An excerpt is automatically generated from the first few sentences of your blog post. Sometimes, this automatic excerpt is not meaningful to the content or catchy. In that case, you can manually add your own excerpt.
The excerpt settings are located in the right-hand column, under the Document settings.
Turn Comments On or Off
Your website comes with a built-in commenting system that allows users to leave comments on your post. Youc an turn off comments for individual posts by un-checking the allow comments toggle under the discussion tab in the document settings to the right of the page.
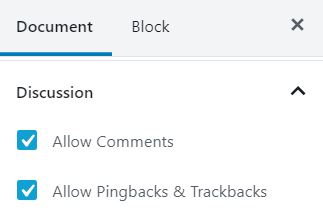
We also recommend that you un-check the “Allow Pingbacks & Trackbacks” option. These allow you and other blogs to notify each other when they link to an article, but often cause issues with spam.
Publishing Options
At the top right of the page, you will see multiple publishing options, including “save draft” and “Publish”. While you are writing your content, we recommend that you save your content as a draft often. When you are finished with your blog post, it is time to select the “Publish’ button!

There are also a few options to control the visibility of your blog post under “Status and Visibility” in the Document settings.
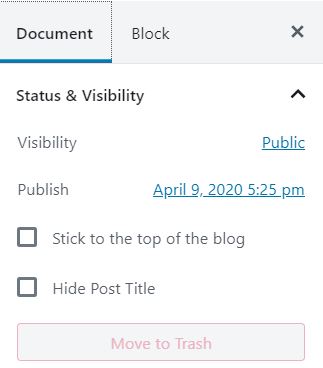
These settings allow you to control the visibility, including allowing your blog post to be visible to the public, private (site admins), or password protected.
You can also schedule your blog post to be published at a specific date and time in the future.
Congratulations on Your Blog Post
Congratulations, you are now an expert at writing and publishing blog posts on your Birthing Your Brand website! If you have any questions, contact us through the live chat at the bottom of your screen or with a help ticket at our knowledgebase.